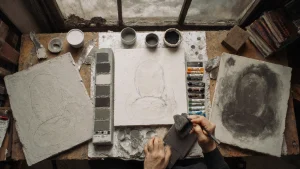
Textured Painting Methods Beyond Traditional Brushwork

Let’s be honest. Sometimes a brush just feels… limiting. You dip, you stroke, you try to build something with depth, but it can fall flat. Literally. If you’re craving more tactile, more visceral surfaces in your art, you’ve come to the right place.
Well, it’s time to put that brush down—or at least, share the spotlight. We’re diving into the wonderfully messy, unpredictable world of textured painting methods that go way beyond simple brushstrokes. This is where your painting stops being just something to look at and starts being something to feel.
Why Bother With Texture Anyway?
Texture adds a soul to a painting. It creates a physical history on the canvas, a record of your process. It plays with light in ways flat color simply can’t, casting tiny shadows and catching highlights that change with the time of day. It’s that secret ingredient that makes people want to reach out and touch your work (even if the gallery guards frown upon it).
Your New Toolkit: Unconventional Tools and Materials
Forget the art store for a second. Some of the best tools are probably in your kitchen or recycling bin. Here’s a rundown of what you can use to start creating incredible textured art.
The Impasto Powerhouse: Palette Knives
This is the most direct route to texture. A palette knife isn’t for mixing paint alone. It’s for laying it on thick. You can create sharp, jagged ridges, smooth, buttery spreads, or craggy, mountain-like terrain. The key is to use a heavy-body acrylic or oil paint. Don’t be shy—load that knife up and think of yourself as a baker icing a very, very abstract cake.
The Found Object Revolution
Look around. What do you see? A plastic card? A fork? Bubble wrap? Corrugated cardboard? You’re looking at your new favorite art supplies.
- Old Credit Cards/Gift Cards: Perfect for scraping. Drag a loaded card across the canvas to create sleek, dynamic streaks and layers of color.
- Bubble Wrap: Dip it in paint and stamp it for a perfect, repetitive dot matrix pattern. It’s fantastic for creating unique, textured backgrounds.
- Fabric and Paper: Adhere pieces of lace, burlap, or even textured paper towels onto the canvas with matte medium. Once dry, paint over them—the texture underneath will ghost through, creating incredible complexity.
DIY Texture Mediums and Pastes
You don’t have to buy expensive texture pastes—though they are great. You can make your own! A simple mixture of acrylic paint, white glue (PVA), and a filler like sand, sawdust, or even coffee grounds can create a custom, gritty paste. Experiment with different ratios. More sand? You get a beach-like grit. More sawdust? A fibrous, organic feel.
| Material | Best For | Pro Tip |
| Modeling Paste | Building high, hard peaks; can be carved when dry. | Apply with a knife, let dry, then sand it for a smooth-but-textured base. |
| Sand | Gritty, earthy textures; fantastic for landscapes. | Mix directly into paint or medium. Start with a small amount—a little goes a long way. |
| Pumice Gel | A rough, stone-like finish that’s incredibly tactile. | It’s heavy. Use it on a sturdy, supported surface like wood panel, not stretched canvas. |
Step-by-Step: A Simple Textured Landscape
Let’s put this into practice. Imagine creating a simple seascape with real depth.
- Prepare Your Ground. Take a wood panel and apply a coarse texture paste mixed with a little blue and white paint. Use a palette knife to create sweeping, wavy motions. Don’t overthink it—you’re building the ocean’s foundation.
- Create the Cliffs. On another section, build up a thick impasto of browns, greys, and ochres. Use the edge of your knife to jab and pull the paint upwards, forming jagged, cliff-like structures.
- Add the Grit. While the paint on the “cliffs” is still wet, sprinkle a little fine sand or coffee grounds onto it. This will give the rock face an authentic, granular feel once it’s dry.
- The Final Layers. Once everything is bone dry, you can glaze over areas with thin, transparent color to unify the piece or add highlights to the textured peaks to make them pop.
Embracing the Happy Accident
Here’s the real secret to mastering these alternative painting techniques: you have to let go. A drip, a splatter, a stamp that didn’t turn out perfectly—these aren’t mistakes. They’re opportunities. They’re what make the piece uniquely yours. The texture has a mind of its own, and honestly, that’s half the fun. Trying to control it completely is a recipe for frustration. Work with the medium, not against it.
Where to Go From Here
The world of textured painting is vast. Once you’re comfortable, you can explore techniques like resin art with embedded objects, or mixed media collage that combines paint, paper, and found items into a rich, layered story. The goal isn’t to follow rules, but to build a surface that speaks—a surface with a history you created, one thick, gritty, glorious layer at a time.
So, what’s lying around your house right now that could become part of your next painting? The only real limit, it turns out, is your willingness to get your hands a little dirty.


